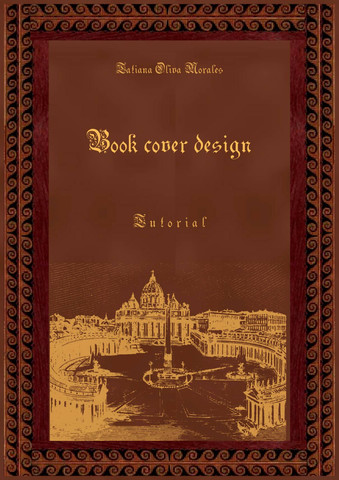
Book cover design. Tutorial
About the author
Tatiana Oliva Morales is the author of the methods and manuals of the series © Linguistic Reanimator, for accelerated preparation for exams at school and linguistic university; of the series © Comprehensive child development from 3 years of age; the author of more than 300 books and study guides in Russian, English and Spanish; English and Spanish teacher with over 25 years of experience; poet, writer, designer and illustrator.
Price
The price of the electronic publication is 350 rubles.
The price of a printed black-and-white edition of the A4 format with a color cover (softcover) is 540 rubles.
The price of a printed black-and-white edition of the A4 format with a color cover (hardcover) is 815 rubles
The price of a printed color publication in A4 format with a color cover (softcover) is 1090 rubles.
The price of a printed color publication in A4 format with a color cover (hardcover) is 1518 rubles
Printed publications can be ordered by calling +7 925 184 37 07
Annotation
The tutorial consists of 2 parts. Part 1 sets forth a theory with detailed explanations of design principles, examples and exercises to work out various techniques. Part 2, the workshop, consists of 28 designs for processing and recreation. The manual is designed to study the principles of book cover design «from scratch». Partly the attention is paid to illustration. On the completion of this course, you will be able to make the design of any complexity and subject matter.
Free snippet
Tatiana Oliva Morales
Book cover design
Tutorial
Шрифты предоставлены компанией «ПараТайп»
Иллюстратор Tatiana Oliva Morales
Дизайнер обложки Tatiana Oliva Morales
© Tatiana Oliva Morales, 2020
© Tatiana Oliva Morales, иллюстрации, 2020
© Tatiana Oliva Morales, дизайн обложки, 2020
The tutorial consists of 2 parts. Part 1 sets forth a theory with detailed explanations of design principles, examples and exercises to work out various techniques. Part 2, the workshop, consists of 28 designs for processing and recreation. The manual is designed to study the principles of book cover design «from scratch». Partly the attention is paid to illustration. On the completion of this course, you will be able to make the design of any complexity and subject matter.
12+
Created by Ridero Intelligent Publishing System
Table of contents
Book cover design
Annotation
From the author
Introduction
Part 1. Theory and practice of cover design and illustrations
Lesson 1. How the graphical editor works (on the example of the Canva site)
Lesson 2. Uploading Images and Downloading Designs
Exercise 1
Exercise 2
Lesson 3. Resizing an image
Exercise 3
Exercise 4
Exercise 5
Exercise 6
Exercise 7
Lesson 4. Changing tone and color of the image, moving around the background
Exercise 8
Exercise 9
Lesson 5. Working with the background
Exercise 10
Exercise 11
Exercise 12
Lesson 6. Image synchronization
Exercise 13
Exercise 14
Lesson 7. Working with text
Exercise 15
Lesson 8. Rotating of the Elements
Exercise 16
Exercise 17
Exercise 18
Exercise 19
Lesson 9. How to make transparent background image
Exercise 20
Exercise 21
Lesson 10. Cover sizes
Lesson 11. How to place illustrations in the text of the book
Lesson 12. Cover Design
Exercise 22
Exercise 23
Lesson 13. Where to look for the material for covers and illustrations, and how to use it
Lesson 14. Lego Сonstructor Technique
Exercise 24
Exercise 25
Exercise 26
Exercise 27
Exercise 28
Exercise 29
Exercise 30
Exercise 31
Exercise 32
Exercise 33
Lesson 15. What the cover should not be
Part 2. Workshop
Task
Annotation
The tutorial consists of 2 parts. The first part sets forth a theory with detailed explanations of design principles, examples and exercises to study various techniques.
The second part, the workshop, consists of 28 designs for processing and recreating. The manual is designed to study the principles of book cover design «from scratch». Partly the attention is paid to illustration.
After completing the full course of this tutorial, you will be able to make any design you are interested in: the cover of a children’s book, a collection of poems, fiction, educational and other literature.
From the author
This tutorial can be used as a self-learning manual. If you need additional consultations or classes, you may contact me. Consultations / classes in person and via Skype are possible.
Individual orders for cover design and book illustration are accepted.
My contact details
Tel 8 925 184 37 07
Skype: oliva-morales
E-mail: oliva-morales@mail.ru
Website:
https://lronline.ru
Respectfully,
Tatiana Oliva Morales
Introduction
It so happened that I became a writer. I write different things — textbooks, prose, sometimes poetry, and, of course, books for children. And, as you know, this is a special kind of literature that requires high-quality content, including a bright and beautiful cover, as well as illustrations.
While I was writing only textbooks, I did not think about any special cover design. Sure, it was important for me. I wanted the cover to be attractive, recognizable, especially since, as a rule, I never write one single textbook, but do them in series.
So, when I realized that I had accumulated material in my computer from which I could get about a hundred educational children’s books, the issue of their covers design and illustrations came up very sharply.
I did not want to entrust both of those processes to anyone else. I perfectly understood that no one except me knew and felt the content of those books better, and therefore he would not complete the design of the covers and illustrations the way I could make.
Despite the fact that I have an art education, and I still draw when I find inspiration, I do it exclusively on canvas or an album sheet — I don’t know how to draw on a computer.
Therefore, I was faced with the task of either learning how to draw on a computer or understanding how the designers work in graphic editors.
I began to google, and after some time I googled the information about the graphic editor on the Canva website. The reviews about it were not bad, so I registered there and began to study the program. It took several days, but my work was not in vain.
After some time, I realized that working on Canva is about as easy as using a Word text editor. Very quickly I filled my hand. I began to make covers and illustrations. Although, of course, each cover was made painstakingly, since I am extremely responsible for the process of its creation, and every detail is important to me.
So on Canva it turned out that you didn’t need to be able to draw on a computer in order to create covers and illustrations, although the art education was very useful to me there.
But I can tell you exactly that you can completely do without having such an education, if you have a taste, a sense of harmony of colors and composition.
Part 1. Theory and practice of cover design and illustrations
Lesson 1. How the graphical editor works (on the example of the Canva site)
In the graphics editor you have a blank white page in front of you. You can set its size (it changes in pixels, millimeters, centimeters and inches). Here you can also select elements for composition from the Canva data bank. It looks like this.

The background color (of the same white page) can also be changed in different ways. You can use the color palette (it is at the top left), you can select a background from the Canva data bank (the window on the left, Background tab) or load your own one (the window on the left, Download tab).
You can work on Canva for free, but then the possibilities will be pretty limited, and you can pay a fee for a month (or for a longer period of time, see Tariff plans), then you will have all the tools to create interesting designs. The monthly maintenance costs about 10 US dollars.
As for the elements that you need to place on the cover — they all change in size, move and rotate, if necessary. Some of them can change color.
All this can be made with the mouse cursor — hold the object with the left mouse button and then move it wherever you want. Using the same cursor, you can change the size of the object. If a color change is available for an object, you will see a palette on the top panel when you click on this object.
The complete picture of how this graphic editor works can be obtained by watching video tutorials at this link
https://www.youtube.com/watch?v=WL-WbHwsbs8
Although personally I chose to go to the rest myself.
Therefore, I further propose to consider the basic functions of Canva by examples and exercises.
Перед публикацией отзывы проходят модерацию


